
As an Amazon Associate, we earn from qualifying purchases with no additional costs for you.
Having a knife blade break is not a pleasant experience for a knife owner, especially if the knife was an expensive knife or it was a favorite knife of yours. Depending on how the knife broke and where the break is, there may still be some hope in salvaging the knife, or at least part of it. You can give out 5 steps to fix a broken knife a go and see if you can save the knife.
Follow these 5 steps to fix a broken knife blade, either a broken tip or a chipped edge.
- Analyze the broken blade.
- Plan the repair of the blade.
- Grind or sand metal from the blade to affect the repair.
- Polish the blade and check the geometry of the blade.
- Sharpen the knife if necessary.
Not all broken knife blades will be able to be fixed, which means that the fixability of the knife will depend on where the knife has broken and how much of it has been broken.
Sometimes the effort that would be required to fix a broken knife does not warrant spending the time and effort to do the repair, and it would be best to replace the knife. Some broken knife blades, however, can be fairly simple to repair, even with some fairly basic tools.
If you are interested in checking out the best whetstones for your knives, we recommend and use you can find them by clicking here (Amazon link).
Steps To Repair A Broken Knife Blade

There are two main ways that a knife blade will most likely break and can conceivably be repaired. The first is the tip of the knife breaking off, and the second is the edge of the knife chipping.
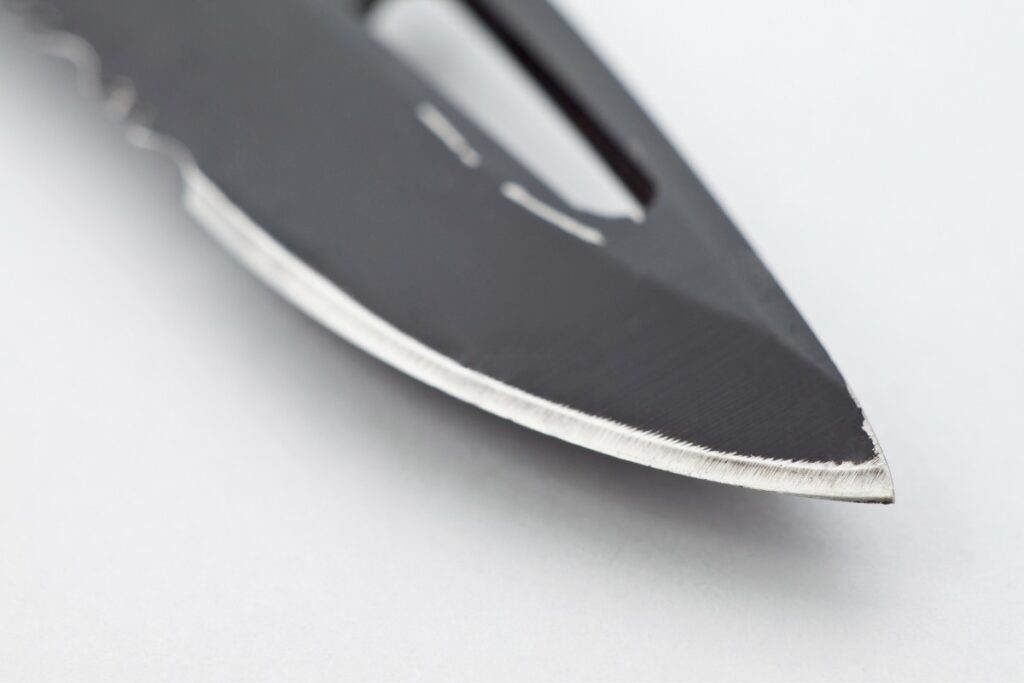
The tip of a knife will break if the tip gets jammed up in something that you are cutting, and you flex the rest of the knife too far to one side or the other. This puts too much stress on the relatively thin tip, and the tip could shear off.
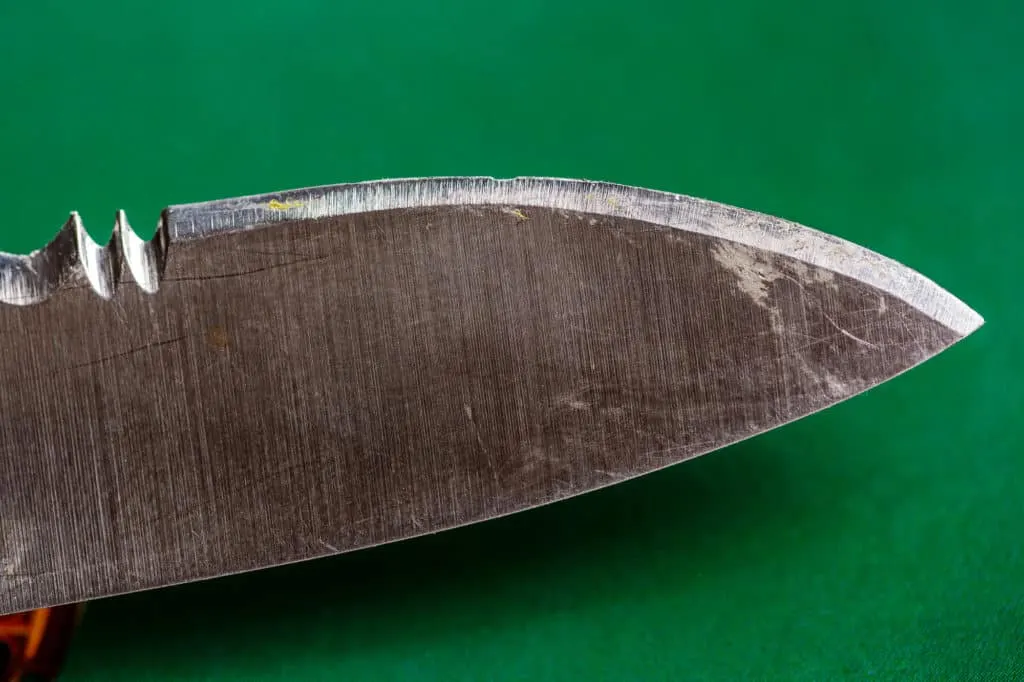
The cutting edge of the knife could become chipped or gouged if you are cutting through something and encounter a hard material.
This is often the case where you are cutting through meat, and the sharp edge hits bone inside the meat. This could cause the thin cutting edge to flex too far, and pieces of the metal will chip out of the edge.
We will discuss the two different broken knife blades separately within the steps since the method used to repair the tip of the blade would be a little different from repairing the edge.
Analyze the Broken Blade
The first action to repairing the knife blade is to give it a good, close examination which will give you some information as to how to continue with the repair or if the repair is not worth pursuing.
You need to examine the damage to the knife carefully to establish the complete extent and whether the damage is localized to one area or if there is damage in other areas of the knife.
If the damage is to the tip of the knife, you need to examine the break to see if there is also a bend in the steel near the break. You will want to get rid of any warped steel during the correction process.
If the damage is edge damage, then you will want to examine any chips in the edge of the blade and see if there are any cracks in the steel that radiate up from the chip towards the spine of the knife. You would need to make sure any repairs tape these cracks out too, and not only the chip.
Plan The Repair Of The Knife Blade
Now that you have examined the knife and you have determined the extent of the damage and whether you think you want to give a repair a shot or not, you can now move on to the planning stage of the operation.
The best tool to use to plan out your repair on the knife is a black Sharpie to plan out the repairs you are going to do on the blade of the knife.
Planning A Knife Tip Repair
If the damage is to the tip, you need to mark out the part of the tip you are going to remove to re-establish the tip.
There are some choices that you need to make at this point on how you are going to tackle the repair. You may think that the easiest approach would be to remove some of the cutting edges of the blade to reshape it to form a new tip.
However, there are many facets to the taper of a knife towards the tip, and if there is a distal taper, the steel may be too thick towards the spine, and you will then struggle to put an edge on the thick steel at the tip.
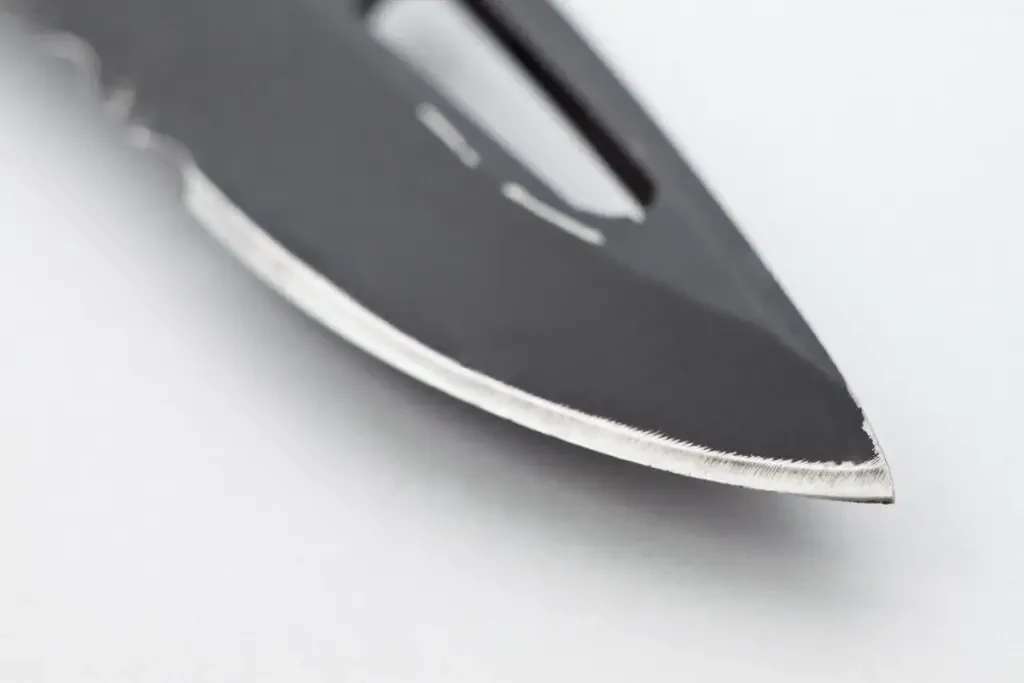
A better approach in some instances would be to remove some on the spine of the knife towards the direction of the sharp edge to re-establish the tip.
You also want to maintain the shape of the original blade as much as possible to keep everything in proportion. This may require some material to be removed on the sharp edge side and will require sharpening as a final step.
Removing steel from the spine side may also prevent the need to put a new edge on the knife since the edge will not be touched during the process.
Whichever way you choose to go, use the Sharpie to draw the new shape of the tip on the blade of the knife. This will allow you to see the new shape and let you make adjustments before you start the reshaping process.
Once you have the shape drawn on the knife, you will also have some guidelines to work to once you get started.
Planning A Knife Edge Repair
Similar to a knife tip repair, you can mark along the knife edge with a Sharpie to guide you with how much material needs to be removed to eliminate the chips from the edge of the knife.
Once again, the Sharpie marks will give you a reference point during the repair process to monitor your progress during the repair.
Mark out the repair on both sides of the blade since you will be working on both sides to repair the damage.
What Tools You Will Need To Repair The Blade?
As part of your planning, you will need to get the tools together that you will be using to do the actual repair of the knife blade.
Tools For A Knife Tip Repair
Repairing the tip of a knife is easiest if done with some sort of power tool. Hand tools can be used, and sometimes they are an advantage because the material is removed more slowly, so you are less likely to overshoot and remove too much material.
Here are the tools that would be useful for this task.
- A Dremel with a drum sander. Dremel is a handy tool that can take many different fitments or bits that would be useful during the repair process, including drum sanders and polishers.
- Belt grinder. A belt grinder or belt sander is very useful if you have one, but not many people will have access to this type of tool.
- A disc sander. A disc sander with varying grits of sanding diss is also a potential tool for this task.
- A hand file and sandpaper. These are the basic tools that you could use to get the job done. A metal file with a range of sandpaper grits to finish the job will work as well as the power tools, but it will just be a little slower.
You will also need some way of clamping the knife in place while you work on the blade. Remember that the edge of the knife is still sharp, so be careful when you clamp the blade and work on it.
TIP: A belt grinder is a great tool for sharpening knives. Check out the complete guide on how to sharpen a knife with the belt grinder in the article below:
DEMO: Can You Sharpen A Knife With A Bench Grinder?
Tools For A Knife Edge Repair
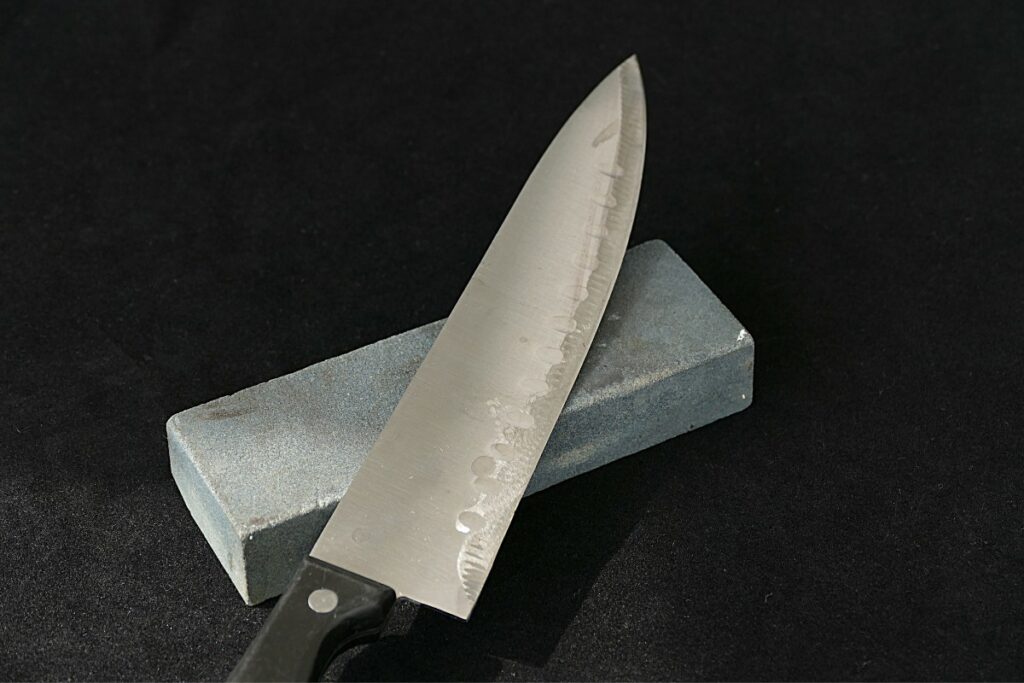
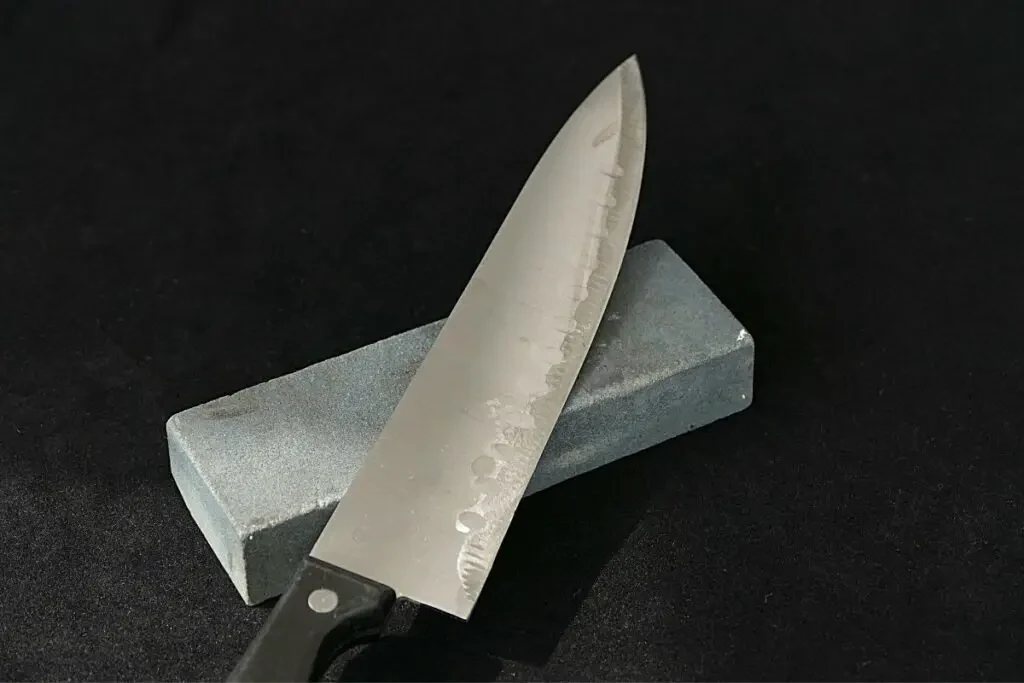
The best tool for edge repair, in my opinion, is a set of whetstones. If you already have a set of stones that you normally use for sharpening, then you will already have all the tools you need.
You can also use power tools such as a belt sander to reshape the edge of the knife, but this takes some experience to do without going too far and removing more material than you intended or overheating the thin edge of the knife and ruining the temper of the steel.
Here are the tools we recommend for an edge repair.
- A set of whetstones in the grit 120/300, 400/1000, 4000/6000. These would be dual stones with one grit on one side and the alternate grit on the other side.
- A set of diamond stones. Diamond stones also cut steel very well and can be used instead of whetstones. You would need the following grits; 400, 600, 1000, and 1200.
You would use these different grit abrasives to remove metal from the blade in varying degrees of aggressiveness, depending on the level of damage on the blade.
TIP: Are you looking to buy a new whetstone? Check out our recommendations (we personally use the first three ones):
Our PRO choice whetstones combo (Amazon links):
- Fixing stone: Whetstone SHAPTON Ceramic KUROMAKU #320
- Sharpening stone: Suehiro CERAX soaking whetstone: Medium #1000
- Finishing stone: Whetstone SHAPTON Ceramic KUROMAKU #5000
Our budget choice (Amazon link): Sharp Pebble Extra Large Sharpening Stone Set
Remove Metal To Repair The Knife Blade
We are now ready to get to the business of repairing the knife blade and reshaping it to address the damage to the blade.
The process for a tup repair and an edge repair will differ because of the different tools used. We will discuss each method separately so you can follow the process for each repair.
Knife Tip Repair
To repair the tip of the knife, you need to set up the relevant tools you are going to need. If you are using a belt grinder or disc sander, you will not need a vice or a clamp, as you will be holding the knife in your hands.
If you are using a Dremel or hand files, you will need to set the knife up in the vice or clamp it firmly to your workbench in a suitable position.
Top Tip: If you are using power tools, you need to constantly feel the blade to ensure it does not get too hot, which will ruin the heat treatment and temper of the steel, effectively ruining the knife.
Slowly use your chosen tool to remove material from the spine of the knife, working toward the tip and watching the markings that you made with your Sharpie. After every one or two passes of the tool over the blade, check the knife to see that you are removing metal evenly.
Slowly work the metal down until you have reached the edge of your marked lines and the tip has been re-established on the knife.
Blade Edge Repair
If you are fixing the edge of the knife, start with a coarse grit stone. If you have a 120-grit, then start with that. You should not use a grit for this initial phase that is higher than 300-grit. It will not remove enough material quickly enough. If you are using diamond stones, start with the 400-grit
Lay the knife down at the normal angle that you would use to sharpen the knife. Move the knife across the stone in a heel-to-tip motion.
Count your strokes, and once you have completed 6 to 8 strokes on one side of the knife, turn the knife over and repeat the action on the other side.
Make sure that you maintain the same angle on both sides of the blade. Continue to use the coarse grit stone, and examine the edge after each set of strokes on the stone.
Once the chips in the edge have disappeared, and you are close to the line that you marked with your Sharpie, go up to the 400-grit whetstone or the 600-grit diamond stone.
Essentially, what you will be doing from this point on is sharpening the edge once the chips have been removed from the edge.
Continue to go up the grits of the stones, using fewer and fewer strokes on each side of the knife till you reach the finishing stones.
TIP: Do you know how to sharpen a hollow edge knife? It is not so complicated, check out the step-by-step guide in the article below:
How To Sharpen A Hollow Edge Knife In 5 Steps
Polish The Repaired Knife Blade
Now comes the finishing touches to the repair that you have made to the knife blade. If you have been working on a tip repair, then you will need to rub-down the spine of the knife with fine grits of sandpaper until the finish on the repaired section of the spine looks similar to the rest of the knife.
This normally only takes a few passes with each grit of sandpaper, and each one will take the metal to a more mirror polish.
If you have been doing an edge repair, you can now finish the edge with a polishing stone, which would be the 6000-grit whetstone or the 1200-grit diamond stone. After this step, your edge repair should be complete, and your knife should be sharp.
Sharpen The Knife If Necessary
If you have repaired the tip, then you may need to touch up the sharp edge of the knife, particularly towards the tip of the knife. Use the method that you would normally use to sharpen the knife. The edge should only need some refining rather than a complete re-sharpen.
Check the shape of the blade that you have modified and make sure it meets your satisfaction.
If you were completing an edge repair o the knife, you would already have finished sharpening the knife in the previous step.
When Can A Broken Knife Blade Not Be Repaired?

Sometimes, the broken blade has broken in a way that it will not be possible to repair the blade, or it would simply be too much work to do the repair.
In some cases, the repair would make the knife nowhere near what the knife was before, and it would not make sense to repair the knife and have a sub-standard result.
The following type of breaks in a knife blade is where you may have to make the hard decision not to repair the knife.
- The blade has snapped off close to the handle.
In this case, there is not enough blade left attached to the handle to repair.
- The blade has snapped in half.
With a knife snapped close to the middle of the blade, you may be able to salvage it, but it would no longer be a knife that could be used for its original intended purpose.
- The knife has cracks in the blade.
Micro-cracks in the blade indicate a weakness in the steel where the cracks have appeared. A knife that has cracks like this is generally not possible to repair with basic tools. Having a repair done professionally may cost you more than what the knife is worth.
- The chips on the cutting edge are severe enough that a repair would require a radical change to the geometry of the knife blade.
Changing the profile of the blade this radically in relation to the handle may make the knife difficult to use. A repair would not be advised unless you are willing to make major modifications to the handle to compensate for the change in the blade shape.
Conclusion
A broken knife tip or a chipped edge may seem like a disaster when it happens, but the damage can normally be repaired, and the knife salvaged.
The tools you use can be varied, and you can even use a set of whetstones to repair the knife tip as well as the knife edge.
Using whetstones to repair a tip will take a bit longer than with other tools but will certainly work if this is all you have available to you.
Next time you have a damaged knife, give the repair a go yourself and see what you can do to restore the knife before you simply replace the knife with a new one.
TIP: Do you know how to fix a chipped Japanese knife blade? It can be quite challenging but you can do it by yourself. Check out the step-by-step guide in the article below:
DIY: Fixing A Chipped Japanese Knife In 4 Simple Steps